
close
Choose Your Site
Global
Social Media


Views: 0 Author: Site Editor Publish Time: 2026-09-14 Origin: Site


Cap embroidery presents a unique challenge for production shops. Curved surfaces and varying fabric tensions make this process notoriously less forgiving than flat embroidery. The equipment decision stage carries high stakes. You must frame the acceptance inspection as your final safeguard. It prevents future production bottlenecks, mechanical downtime, and sunken costs. Establish one baseline rule before moving forward. Never sign the final acceptance protocol. Do not pay the remaining balance until the unit passes a rigorous hardware, software, and output stress test. We will guide you through this uncompromising inspection process. You will learn how to validate hardware integrity, stress-test software automation, and assess live stitch quality. A methodical approach ensures your new equipment operates exactly as promised from day one.
Focus on identifying shipping damage, build quality, and your mechanical baseline before applying power.
Begin your inspection by evaluating unboxing and structural integrity. Inspect the heavy-duty steel stand carefully. Check the entire machine chassis for hairline fractures. Look closely for misalignment or shipping-induced warping. Forklifts and transit vibrations often stress industrial equipment frames. Minor frame bends severely disrupt high-speed stitching later. Ensure the machine sits perfectly level on your shop floor. An unlevel chassis causes unnecessary vibration during intensive cap runs.
Next, evaluate the cap driver and hoop mechanics. Attach the wide-angle cap driver to the pantograph. Slide the cap ring on and off manually. You must evaluate the smoothness of the rail system. You want zero resistance or grinding. Any friction or catching here will result in distorted designs. The driver cylinder must rotate freely without wobbling. Wobble indicates damaged bearings or bent shafts.
Assess the rotary hook and needle clearance thoroughly. Manually rotate the main shaft using the degree wheel if possible. Check the physical clearance between the needles and the rotary hook point. Proper alignment prevents catastrophic needle strikes. The hook point should pass just behind the needle scarf. It should never physically scrape the metal.
Follow these essential hardware checks before plugging anything into a wall outlet:
Missing these physical defects before powering up transfers the blame to you. Document any cosmetic or structural flaws immediately.
Ensure the delivered unit strictly matches the promised technical capabilities and contract.
Start your validation by checking the motor and drive system. Confirm the presence of servo motors or stepper motors. Cross-reference this detail against your documented cap embroidery machine specifications. Servo motors generally offer better torque and quieter operation. They handle the heavy resistance of structured hats effortlessly. Stepper motors cost less but often generate more heat during continuous shifts.
Count the needles and measure the maximum cap embroidery field. Do not assume the factory sent the correct configuration. Verify the 270-degree wide-angle capability physically. Mount the widest cap hoop provided. Manually sweep the driver from extreme left to extreme right. This ensures it meets your specific production needs. Restricted movement limits your ability to embroider ear-to-ear designs.
Perform a strict accessory audit immediately upon delivery. Cross-reference your original packing list. Ensure you received the exact number of cap hoops requested. Count your flat tubular hoops. Verify the sizes match your order sheet. Inventory the toolkits, Allen wrenches, and spare consumables. Check for included needles, bobbins, and oilers.
We recommend using a formal validation chart during this process.
Hardware Validation Checklist
| Machine Component | Expected Standard | Failure Indicator |
|---|---|---|
| Main Drive Motor | Servo or heavy-duty stepper | Excessive heat, loud grinding noises |
| Embroidery Field Size | Full 270-degree wide angle | Restricted left/right rotation limits |
| Cap Hoop Construction | Rigid metal, secure latches | Warped rings, loose tension clips |
| Spare Consumables | Brand-name needles, fresh bobbins | Missing toolkits, substituted cheap parts |
Do not accept substitute accessories. Factories sometimes ship generic hoops instead of premium branded hoops. Insist on receiving the exact items listed in your purchase agreement.
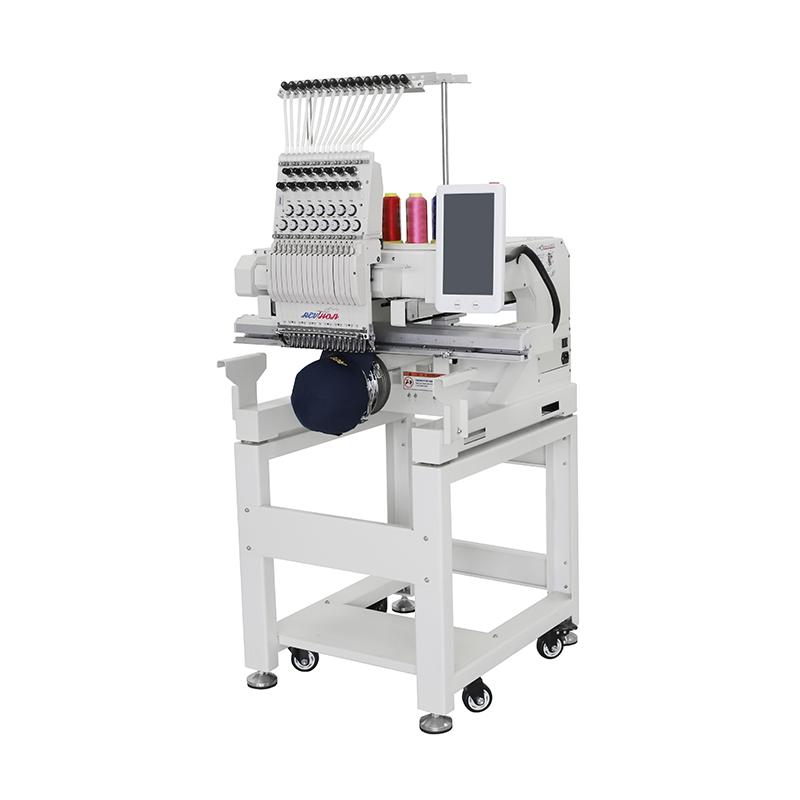
Evaluate software responsiveness, automation features, and electrical reliability.
Boot up the embroidery machine and navigate the primary touchscreen. Test the control panel and user interface rigorously. Look for input lag when pressing buttons. Watch out for screen flickering, display glitches, or language localization errors. A responsive interface prevents operator frustration. It also indicates a healthy internal motherboard. Test the emergency stop button to ensure it cuts power instantly.
Check design transfer and internal memory capabilities. Load a highly complex DST or DSB file via USB or Wi-Fi. Verify the onboard memory capacity by loading multiple large files. Assess the file loading speed. Slow transfers often indicate outdated internal processors. Modern equipment should parse a 50,000-stitch design in seconds. If the software freezes during loading, flag it as a critical failure.
Verify the automated workflow functions. You must test the specific advanced embroidery technology embroidery machine features under load. Inspect the auto-thread trimming mechanism. Does it cut the top and bottom threads cleanly? It should not leave long thread tails. Messy trims require costly manual cleanup later. Observe the color change mechanisms closely. The transition between needles must remain smooth and mechanically quiet. Jerky or loud color changes suggest poor lubrication or misaligned cams.
Finally, test the thread break detection system. Run the machine at a moderate speed. Manually snap the upper thread. Optical or mechanical sensors must stop the machine immediately. Count how many stitches the machine takes before stopping. A delayed stop ruins complex garments. It forces you to manually back up the design, wasting valuable production time.
The ultimate proof of performance relies on stitching a complex design on a difficult substrate.
Do not perform your final test on flat fabric. Use a stiff, 6-panel structured cap. Structured caps feature a thick buckram backing and a bulky center seam. This center seam acts as the perfect stress test for needle penetration. Flat fabric hides mechanical timing errors. A structured cap exposes them immediately.
Evaluate 3D puff embroidery capability next. Run a bold, satin-stitch design using high-density EVA foam. Check the motor punch force during this process. The machine must penetrate the thick foam cleanly. You should see no needle deflection. The foam should tear away easily after stitching. Poor penetration leaves ragged foam edges and damages needles.
Examine design registration closely. Evaluate the alignment of outlines and borders. Do the black borders perfectly enclose the colored fill stitches? Poor registration on a cap implies serious mechanical issues. It often points to a loose cap driver assembly. It may also indicate inaccurate X/Y axis motor timing. Push and pull compensation issues become glaringly obvious on curved panels.
Inspect tension consistency on the inside of the cap. The white bobbin thread should occupy exactly one-third of the total stitch width. Look for signs of "birdnesting" or massive thread bunching. This issue indicates severe tensioning flaws or hook timing problems. Catching this early saves countless ruined garments.
Reject the unit if the live output fails. Cosmetic machine perfection means nothing if it cannot sew a clean hat.
Solidify the vendor relationship and post-purchase safety nets.
Demand an installation and calibration sign-off document. If a factory technician installed the unit, ask detailed questions. Require them to explain their specific tension calibrations. Cap usage requires different settings than flat garments. Make them demonstrate how to adjust the bobbin tension properly. Confirm they leveled the machine before leaving.
Review the warranty activation protocol and exact terms. Clarify the precise start date of your coverage. Distinguish clearly between coverage for electronic parts and mechanical parts. Electronic components like touchscreens often get one to two years of coverage. Heavy mechanical parts usually receive three to five years. Ask who pays for shipping if a part fails.
Confirm your Service Level Agreement and support access. You need a fast protocol for emergency troubleshooting from your cap embroidery machine supplier. Determine your specific access level. Do you get direct phone support? Will you rely on a slow ticketing system or just a generic email address? Fast technical support prevents extended downtime and lost revenue.
Ensure you possess proper training resources before the technician departs. Request access to digital and physical operator manuals. Ask for scheduled maintenance charts detailing daily, weekly, and monthly oiling points. Obtain video tutorials specific to the exact model delivered to your floor. Generic manuals for older models cause massive operator confusion.
A methodical, uncompromising inspection protects your capital investment. Accepting a cap embroidery machine marks a legal transfer of liability from the seller to you. You must perform a rigorous Factory Acceptance Test right on your shop floor. This detailed diligence ensures you inherit a reliable, revenue-generating asset, not an unpredictable mechanical liability.
We advise buyers to act confidently during this phase. Withhold your final payment until the machine meets all documented test parameters. Do not compromise on stitch quality just to speed up delivery. Demand proper calibration for structured hats. Verify every physical component against your contract.
Follow this blueprint to avoid future production headaches. Train your operating staff on these exact inspection points. Hold your vendor completely accountable for their promised deliverables. A perfect installation creates the foundation for years of profitable embroidery.
A: Commercial machines typically operate between 70 and 80 decibels. You should hear a consistent, rhythmic motor hum. Slight tapping from the needle bar is normal. However, you must investigate harsh grinding, loud clanking, or irregular squeaking immediately. These sounds often indicate poor lubrication, loose belts, or impending mechanical failure.
A: Halt the acceptance process immediately. Document the specific flaw with high-resolution photos. Show the results to the installation technician. Request immediate recalibration of the rotary hook, cap driver, or thread tension. Do not sign the delivery paperwork. If the technician cannot resolve the issue, demand a replacement unit.
A: Yes, cap embroidery physics naturally cause slightly more thread breaks. The curved surface and rigid buckram backing create variable fabric tension. However, excessive breaks are not normal. Frequent snapping points to improper digitizing, bad needle alignment, or poor machine timing. Adjust your tension and check your needle condition.
A: Yes, maximum speed significantly reduces output quality on curved surfaces. Specifications might claim 1000 to 1200 stitches per minute. Physics dictate a different reality. You should run caps at roughly 600 to 800 SPM. This optimal speed ensures perfect design registration, minimizes needle deflection, and reduces thread breaks.


