close
Choose Your Site
Global
Social Media


Views: 0 Author: Site Editor Publish Time: 2025-08-08 Origin: Site


If you want to learn how to thread a needle on an embroidery machine, you are in the right place. Threading can look hard at first, but you will get better with practice. Some embroidery machines have automatic threaders. Others need you to thread by hand. Being ready and knowing what to do if something goes wrong helps a lot.
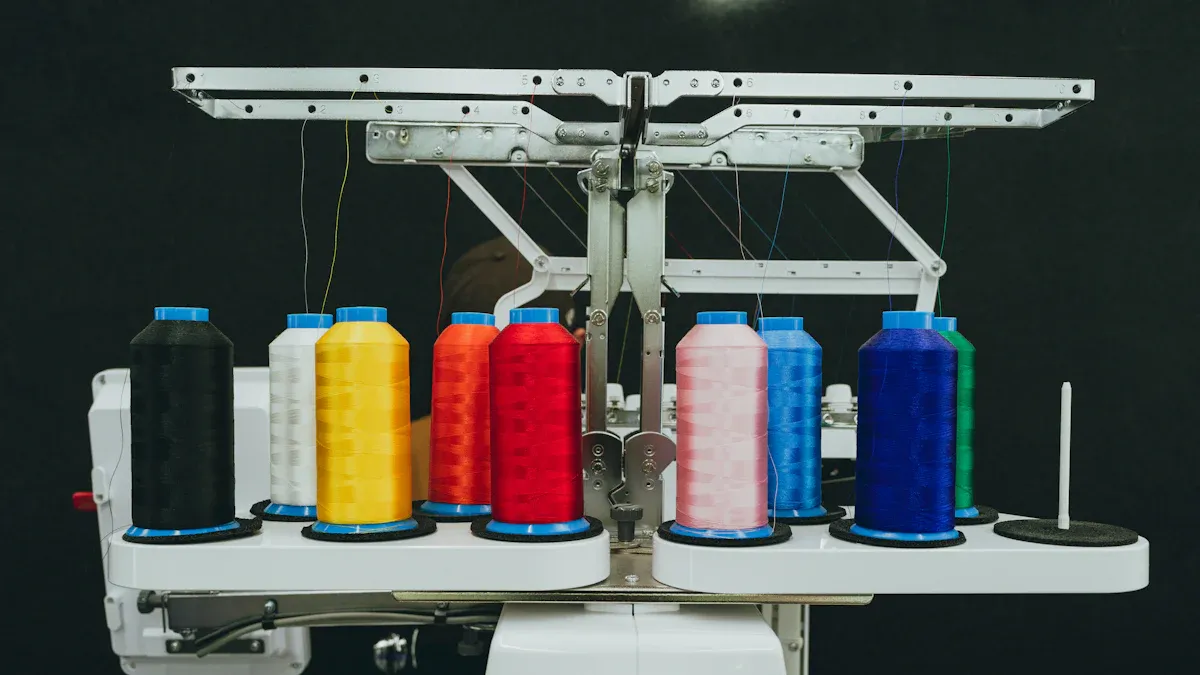
Here are the most common embroidery machine types for beginners and professionals:
User Level | Common Machine Models | Key Features | Typical Use Case |
|---|---|---|---|
Beginners | Brother SE600, Janome Memory Craft 400E, Singer Legacy SE300, Brother PE535, Janome Jem Gold 660 | Easy to use, built-in embroidery designs, USB ports, LCD screens, automatic needle threaders | Learning embroidery, small personal projects |
Professionals | Brother Innovís NV1800, Janome Continental M7, Melco EMT16X, SWF embroidery machines | Bigger workspaces, faster stitching, multi-needle and multi-head options | Hard, commercial embroidery projects |
You can use this guide with any embroidery machine, from single head to multi-head models. No matter your skill, these steps will help you as you start your embroidery journey.
Always get your embroidery machine ready by turning it off. Raise the needle and lift the presser foot. This makes threading safe and easy.
Use the correct needle size and good embroidery thread. This helps stop thread breaks. It also gives you smooth and neat stitches.
Follow the right thread path very carefully. Do this by hand or with an automatic threader. This stops tension problems and skipped stitches.
Keep your workspace clean and bright. Use sharp scissors to cut thread ends at an angle. This makes threading easier.
Practice threading often and use the step-by-step checklist. This helps you feel sure and enjoy your embroidery projects. You will make fewer mistakes.
Getting your embroidery machine ready is very important. Good preparation helps you avoid mistakes. It also keeps your work looking neat. Let’s go over the basics together.
You need to be safe before you start. Here are some things to do:
Turn off your embroidery machine first. This stops it from running by accident.
Move the needle up with the handwheel. This makes threading safer and easier.
Keep your fingers away from the needle. Hold your hands back while you work.
Raise or lower the presser foot as the manual says. This helps the thread move well.
Use the right needle size for your thread and fabric. Most embroidery uses sizes from 75/11 to 100/16.
Be gentle with the needle threader if your machine has one.
Keep your workspace clean. Dust and lint can cause trouble.
Always follow the threading steps for your machine model.
Tip: Do not sew over pins. Take them out before the needle gets close. This helps you avoid breaking the needle.
You need the right tools to make threading easy. Here is what you need:
Essential Supply | Description & Purpose |
|---|---|
Embroidery Needles | Use different sizes for different threads and fabrics. Always keep extras nearby. |
Embroidery Threads | Pick good quality threads for smooth stitching. |
Embroidery Scissors | Sharp scissors help you cut threads neatly. |
Temporary Adhesive | This holds stabilizers in place for better embroidery. |
If you use embroidery accessories from Zhuji Qihong Electro-Mechanical Co., Ltd., you get tools that work well. These products fit single head and multi-head embroidery machines. You can use them for any project, big or small.
Set up your embroidery machine for threading like this:
Lift the presser foot lifter. This opens the tension discs for easy threading.
Turn the handwheel to raise the needle all the way up.
If your machine is computerized, use the straight stitch. Center the needle for best results.
Good lighting helps a lot. Use a bright LED sewing light or sunlight. This lets you see the needle and thread clearly. It helps you avoid mistakes and makes threading easier.
Always check that your needle is put in the right way. Use recommended thread brands. High-quality threads from Zhuji Qihong Electro-Mechanical Co., Ltd. help your embroidery work well. They help you get great results every time.
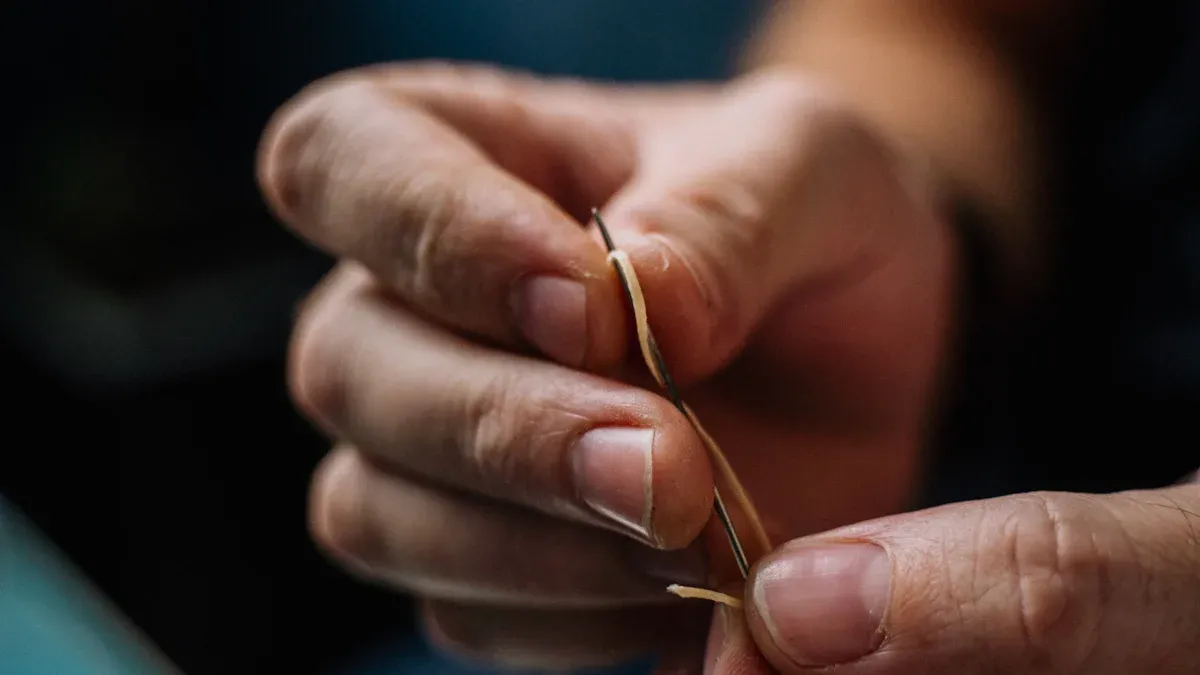
Threading a needle by hand on your embroidery machine might seem tricky at first, but you can master it with a little practice. Whether you use a single head embroidery machine or a multi-head embroidery machine, knowing how to thread a needle by hand is a skill every embroiderer should have. Let’s walk through the process together.
You want to make threading a needle as smooth as possible. Here’s a simple step-by-step guide for how to thread a needle on your embroidery machine:
Cut your embroidery thread to a length of about 12–18 inches. This helps prevent tangling and makes handling easier.
Use sharp embroidery scissors to cut the thread end at a diagonal angle. This creates a pointed tip that slides through the needle eye more easily.
Moisten the cut end slightly. Flatten it between your thumb and finger to keep the fibers together.
Hold the thread end about 1/4 inch from the tip with your non-dominant hand.
Hold the needle in your dominant hand, positioning the eye directly over the thread end.
Bring the needle down onto the thread, guiding the thread through the eye.
Pull the thread through, leaving a tail of about 2 inches.
Tip: If you find it hard to push the thread through, try the “needle-to-thread” method. Hold the thread steady and move the needle eye toward the thread instead of the other way around.
If you want extra security, wind the thread around the needle three or four times, then pull the coils down to form a small knot at the end. This keeps your thread from slipping out while you work on your embroidery project.
After you’ve threaded the needle, you need to follow the correct thread path on your embroidery machine. Each model is a little different, but most computerized embroidery machines and commercial embroidery machines use a similar process. Here’s a general guide:
Place the thread spool on the spool pin, making sure it unwinds smoothly.
Pull the thread through the first thread guide at the top of the machine.
Guide the thread down and around the tension discs. Make sure the presser foot is raised so the tension discs open up.
Bring the thread up to the take-up lever and thread it from right to left.
Guide the thread back down through any remaining guides near the needle.
Thread the needle from front to back.
Pull the thread under the presser foot and leave a short tail at the back.
If you use a multi-head embroidery machine, repeat these steps for each needle and thread path. Always check your machine’s manual for specific instructions.
Here’s a quick table of common mistakes to avoid when threading a needle on an embroidery machine:
Common Mistake | Explanation |
|---|---|
Not raising the presser foot while threading | Tension discs stay closed, causing tension problems and poor stitching. |
Skipping tension discs or guides | Thread slips or tension is off, leading to skipped stitches or breaks. |
Using bent or dull needles | Causes skipped stitches and thread catching. |
Wrong needle size | Damages fabric or thread, causes stitching errors. |
Not cleaning lint or debris from thread path | Lint interferes with tension and sensors. |
Incorrect thread tension settings | Too tight or loose tension causes loops, bird nests, or skipped stitches. |
You can make threading a needle much easier with a few simple tricks. Here are some easy ways to thread a needle and keep your embroidery running smoothly:
Always work in good lighting. Use a bright LED lamp or natural sunlight to see the needle eye clearly.
Trim the thread end cleanly with sharp scissors. A neat, diagonal cut helps prevent fraying.
Moisten the thread end slightly and flatten it between your fingers. This keeps the fibers together and makes threading easier.
Use the right needle size for your thread and fabric. Tapestry needles with larger eyes work well for thicker threads.
Try the “needle-to-thread” method if you struggle with small needle eyes.
Keep your thread at a manageable length to avoid tangling.
Separate embroidery floss strands if you want finer detail. Gently tease them apart and smooth them before threading.
If the thread keeps fraying, check for burrs on the needle or presser foot and replace them if needed.
Use high-quality embroidery thread from Zhuji Qihong Electro-Mechanical Co., Ltd. for the best results on your single head embroidery machine or multi-head embroidery machine.
Clean your machine’s tension discs and thread path regularly to prevent lint buildup.
If you still have trouble, consider using a needle threader as an extra tool.
Note: Always check that the needle is inserted correctly and pushed all the way up. A new, sharp needle makes threading a needle much easier and helps prevent thread breaks.
Learning how to thread a needle on your embroidery machine is a key skill. With these tips and a little patience, you’ll find that threading gets easier every time. If you ever need a refresher, just come back to these easy ways to thread a needle and keep your embroidery projects running smoothly.
Automatic needle threaders make embroidery much easier, especially if you want to save time or have trouble seeing small needle eyes. Many modern embroidery machines, including single head and multi-head models, come with this handy feature. If you want to know how to thread a needle using an automatic threader, you are in the right place.
You can use the built-in threader on your embroidery machine by following these simple steps. This method works for most computerized embroidery machines and commercial embroidery machines:
Raise the needle to its highest position. Turn the handwheel or press the needle up button. This lines up the threader hook with the needle eye.
Lower the presser foot. This keeps the thread tension just right for threading.
Set your machine to straight stitch mode. Make sure the needle is centered so the threader works smoothly.
Hold the thread at a 2 o’clock angle. Leave about 4 inches (10 cm) of slack.
Guide the thread under the first hook or notch on the needle bar. Pull it toward you while keeping the angle and slack.
Lower the needle threader lever. The threader head will swing around and cup the needle eye from behind.
Cross the thread from left to right in front of the needle. Guide it into the small wire hook that goes through the needle eye.
Release the thread gently as you lift the lever. This forms a loop behind the needle.
Pull the thread loop from behind the needle. Do not pull from the front, or the thread might slip out.
Tip: Always check your machine’s manual for special instructions. Some embroidery machines have unique threader designs.
If you follow these steps, you will see how to thread quickly and easily. Automatic needle threaders help you get started on your embroidery projects without frustration.
Even with automatic needle threaders, you might run into problems. Here are the most common mistakes people make and how you can avoid them:
Not raising the needle all the way up. The threader hook will not line up with the needle eye.
Forgetting to lower the presser foot. This can mess up the thread tension and make threading a needle harder.
Skipping thread guides or not following the correct path. The thread might not catch or could get tangled.
Using the wrong thread tension. If the thread is too loose or too tight, the threader may not work.
Holding the thread the wrong way. If you do not keep the right angle or slack, the hook may miss the thread.
Using a bent or damaged needle. The threader hook cannot pass through a bent needle eye.
Trying to use tiny needles (smaller than size 75/11) or thick, metallic, or stiff threads. These do not work well with automatic threaders.
Forcing the threader lever or using it while the machine is running. This can break the threader.
Note: If your automatic threader stops working, check if the hook is bent or misaligned. You can gently realign it with a small tool, but if it still does not work, you may need professional service.
If your automatic needle threader fails, try these steps:
Make sure the needle is at its highest position.
Check that the needle is fully inserted and facing the right way.
Use the correct needle size (75/11 to 100/16). Avoid wing or twin needles.
Use smooth, machine embroidery thread. Avoid metallic or very thick threads.
Follow the correct threading sequence through all guides.
Adjust the thread tension so it is snug but not tight.
Do not force the lever. If it feels stuck, stop and check for damage.
If the threader hook is bent, gently realign it. If you cannot fix it, contact a professional.
Callout: Automatic needle threaders are a great tool for anyone who wants to make embroidery easier. If you take care of your machine and follow these steps, you will spend less time threading and more time creating beautiful embroidery designs.
Learning how to thread with an automatic threader can save you time and frustration. Whether you use a single head embroidery machine or a multi-head embroidery machine, this feature helps you focus on your creative work. If you ever have trouble, remember these tips and keep your embroidery projects running smoothly.
Q: Why won’t my thread go through the needle or the machine?
You might run into this problem often, especially when you start with embroidery. The most common reasons include a frayed thread end, a needle that is too small for your thread, or missing a guide in the threading path. Always cut your thread at a sharp angle and moisten the tip. Make sure you raise the presser foot before threading. If the thread still won’t go through, check if the needle eye is large enough for your thread. Larger needle eyes help thicker threads pass through easily and reduce friction, which keeps your embroidery smooth and prevents breakage.
Tip: If you use specialty threads like metallic or rayon, switch to an embroidery needle with a larger eye. This helps prevent shredding and skipped stitches.
Q: How do needle size and thread type affect embroidery threading?
The right needle and thread combination makes a big difference. The anatomy of the needle—like the eye size, groove, and scarf—affects how well the thread passes through. Here’s a quick guide:
Needle Size | Best For | Thread Type | Fabric Type |
|---|---|---|---|
60/8–70/10 | Lightweight fabrics | Fine thread | Sheer, delicate |
75/11–80/12 | Most embroidery projects | Standard thread | Cotton, blends |
90/14–100/16 | Heavy fabrics, thick threads | Heavy, specialty | Denim, canvas |
Always match your needle to your thread and fabric. Replace dull or bent needles often. Test your needle and thread on a scrap before starting your main embroidery project.
Q: What makes threading multi-needle embroidery machines tricky?
Multi-needle embroidery machines let you use several colors at once, but each needle has its own thread path and tension. Here are some tips to keep things running smoothly:
Thread each needle separately, following the correct path for each one.
Pre-thread all needles with the right color before you start. This saves time during color changes.
Adjust each tension dial for the thread and fabric you use.
Use spool caps that fit your thread cones to prevent tangling.
Clean the tension discs and bobbin cases often to avoid jams.
If you get a thread jam, stop the machine, remove the hoop, and clear the tangle with tweezers.
For specialty threads, thread slowly and use needles with larger eyes.
Note: Regular cleaning and maintenance help prevent most threading problems. Always follow your embroidery machine’s manual for best results.
Here’s a handy checklist you can follow every time you thread your embroidery machine. This works for both single head embroidery machines and multi-needle embroidery machines.
Choose the Right Needle and Thread
Pick a needle size that matches your thread and fabric. For most embroidery, an 80/12 needle works well with 40wt–50wt threads.
Use high-quality embroidery thread for smooth results.
Prepare Your Workspace
Clean your embroidery machine. Remove lint and dust from the thread path and bobbin area.
Gather all your tools: sharp scissors, extra needles, and a needle chart.
Make sure you have good lighting.
Set Up the Machine
Raise the presser foot. This opens the tension discs for easy threading.
Place the thread spool on the correct pin. Remove any kinks or curls from the thread.
Thread the Upper Path
Follow the numbered guides on your computerized embroidery machine.
Pass the thread through the take-up lever and all guides.
Thread the needle by hand or use the built-in threader.
Insert and Thread the Bobbin
Place the bobbin in the case with the thread unwinding in the right direction.
Guide the thread through the slot and tension spring.
Use the handwheel to pull up the bobbin thread.
Check and Test
Pull both threads under the presser foot.
Run a test stitch on scrap fabric to check tension and stitch quality.
If you run into trouble, re-thread the machine from the start and check for bent needles or lint.
Always match your needle type to your fabric. Use sharp needles for woven fabrics and ballpoint needles for knits.
Replace dull or bent needles often. This helps prevent skipped stitches and thread breaks.
Clean your embroidery machine regularly. Lint and dust can cause tension problems.
Organize your workspace. Keep tools and charts within reach for faster setup.
Use embroidery accessories and threads from Zhuji Qihong Electro-Mechanical Co., Ltd. for reliable performance on any embroidery machine.
If you use a multi-needle embroidery machine, thread each needle carefully and adjust each tension dial.
Don’t rush. Take your time to follow each step. This helps you avoid mistakes and keeps your embroidery looking professional.
Remember: Practice makes perfect! The more you thread your embroidery machine, the easier it gets. Keep this checklist nearby for quick reference and enjoy your creative projects.
Threading your embroidery machine will get easier with practice. Look at the checklist above if you forget a step. Try both manual threading and the automatic threader to find what you like. If you have problems, do not worry. Fixing mistakes is normal when you are learning. This is true for single head embroidery machines and commercial multi-needle models. Keep practicing and have fun with your creative projects!
Change the needle after each big project. Change it if you see skipped stitches. New needles help your single head embroidery machine work well. They also keep your designs neat and sharp.
Use high-quality polyester or rayon embroidery thread. These threads are strong and have bright colors. You will get fewer thread breaks. Zhuji Qihong Electro-Mechanical Co., Ltd. sells good threads for commercial embroidery machines.
You can use regular sewing thread. But embroidery thread works better. Embroidery thread is smoother and made for fast stitching. Your embroidery machine will work best with the right thread.
Thread breaks if you use the wrong needle size. Poor-quality thread can also cause breaks. Not cleaning your machine can be a problem too. Always follow the threading path. Use trusted accessories from Zhuji Qihong Electro-Mechanical Co., Ltd.
A single head embroidery machine has one needle. It is good for small projects. Multi-head embroidery machines have many needles. You can make many designs at the same time. Businesses use multi-head machines to work faster.


